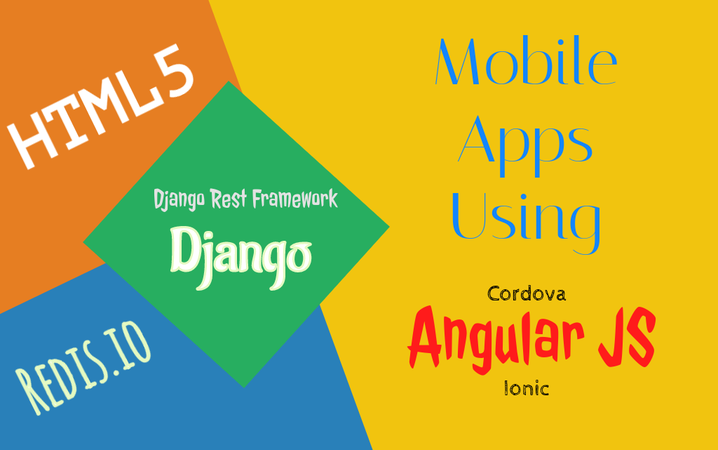
Goal of the app:
The goal of the app is to build a chat application using djangorest and redis.
Process:
- Building RestServices using Django & DjangoRestFramework
- Building MobileApp
- Integrating AngularJS and Webservices
- Deploy
Part - 1
Building RestServices & chat application
- Create Django project
- Create your models
- Create serializers
- Create viewsets and link with router
- Implementing authentication
- Asynchronous chat implementation using redis
Part - 2
Building MobileApp
- Install platform sdk (For Android, Windows and IOS)
- Install cordova (For Android, Windows and IOS)
- Create cordova project (Creating project, Add Platform and Add Plugins)
Integrate AngularJS & Webservice
- Integrate angularjs
- Integrate webservices
Part - 3
Deploy your app
- Deploying android app
- Deploying windows app
- Deploying ios app
About the chat app
In this chat app user need to get registered using email or username and password, and after register he can view all the users to chat with, when he select any user then he can send messages. And the reciepent should recieve the message asynchronously and vice versa.
1.1. Creating django project
Before creating django we need to install all the required softwares. For this app we need to have the following dependencies.
- virtualenv
- redis-server
Step 1:
Create virtualenv and install following dependencies
virtualenv djapp
$ source djapp/bin/activate
$ pip install django unipath djangorestframework django-redis django-redis-sessions django-websocket-redis redis
Step 2:
Create django project and create necessary files.
$ django-admin startproject djchat
Step 3:
Change the settings file
Add these apps to INSTALLED_APPS
INSTALLED_APPS = (
    'others',
    'rest_framework',
    'ws4redis',
)
allow requests from all
ALLOWED_HOSTS = ['*']
Configure RestFramework
REST_FRAMEWORK = {
 'DEFAULT_PERMISSION_CLASSES': (
     'rest_framework.permissions.AllowAny',
 ),
 'DEFAULT_AUTHENTICATION_CLASSES': [],
 'DEFAULT_FILTER_BACKENDS': (
     'yourapp.filters.CustomFilterBackend',
 ),
 'PAGINATE_BY': 10,
 }
In the above configuration we've made DEFAULT_AUTHENTICATION_CLASSES to empty list [], because if you implement token base authentication then it'll not work if you not overwrite this. And for easy testing purpose we're commenting this DEFAULT_PARSER_CLASSES. While you deploying this app you should uncomment this. And for the rest of the options we'll discuss later.
Add redis websocket configuration
Example:
WEBSOCKET_URL = '/ws/'
WS4REDIS_EXPIRE = 60
WSGI_APPLICATION = 'ws4redis.django_runserver.application'
SESSION_ENGINE = 'redis_sessions.session'
SESSION_REDIS_PREFIX = 'session'
WS4REDIS_EXPIRE = 10
WS4REDIS_PREFIX = 'ws'
WS4REDIS_HEARTBEAT = '--heartbeat--'
Step 4:
Create required apps for authentication and services. For the sake of integrity i'm creating two apps.
authentication
This app will serve user information and authentication, so that you can port this app some other projects easily without any monkey patching.
services
This app will actually serve our business logic. I'm putting these two apps in a module called core, just for integrity and extending purpose. So my project structure will be like this
project/core/authentication
project/core/services
project/project/somefiles
project/manage.py
Don't forget to add these apps in INSTALLED_APPS, so your INSTALLED_APPS will be like this.
INSTALLED_APPS = (
    'others',
    'rest_framework',
    'ws4redis',
    'core.authentication',
    'core.services',
)
1.2. Creating models
For this chat application we need to have following models.
We're maintaining user information and authentication information in authentication app. So place the following models in core/authentication/models.py. So that you can easily port to another project.
1.2.1. Users model
This model is used to store the user information
1.2.2. Token model
For this app we're implementing token based authentication, so we are creating our own strategy to do this.
In this model we're going to store users token information.
Token model:
class Token(models.Model):
    user = models.ForeignKey(Users)
    token = models.CharField(max_length=40, primary_key=True)
    created = models.DateTimeField(auto_now_add=True)
def save(self, *args, **kwargs):
    if not self.token:
        self.token = self.generate_token()
        return super(Token, self).save(*args, **kwargs)
def generate_token(self):
    return binascii.hexlify(os.urandom(20)).decode()
def __unicode__(self):
    return self.token
Note: We're not going to store message in database, but we're going to achive chat service using redis.
1.3. Create serializers
Serializer are the way to select the input and output to model to or from the client. This all in the part of djangorestframework.
Create file called serializers.py in core/authentication and add the following.
from rest_framework import serializers
from .models import Users
## For list purpose
 class UsersListSerializer(serializers.ModelSerializer):
     class Meta:
         model = Users
         fields = ('id','username','first_name', 'last_name', 'email',date_joined')
## For update serializer
 class UsersUpdateSerializer(serializers.ModelSerializer):
     class Meta:
         model = Users
         fields = ('first_name', 'last_name', 'email')
Why multiple serializers ?
You may ask why we need to have multiple serializers ? let assume we've only one serializer, then for list of users we'll get password and other information too. This is not a best practice and a security hole. So, for that purpose we're maintaining multiple serializers.
1.4. Creating viewsets
Before creating viewsets, we need to have following facilities.
- Able to specify multiple serializers for multiple actions in viewsets
- Able to do pre_save & post_save functionalities. This is becuase we need to save some fields which are derived.
So, we need to have some hooks to perform these operations. For this purpose i'm creating custom viewset called CustomModelViewset by extending default restframework's ModelViewSet.
Step 1:
Create another file called viewsets.py in authentication or services but remember from where to import at usage time.
Step 2:
And place the following content in that file.
class CustomModelViewSet(viewsets.ModelViewSet):
     def get_serializer_class(self):
         serializer_class = self.parser['default']
         if getattr(self,'action') in self.parser:
             serializer_class = self.parser[getattr(self,'action')]
         if self.request.user.is_superuser:
             if 'admin_'+getattr(self,'action') in self.parser:
                  serializer_class = self.parser['admin_'+getattr(self,'action')]
         return serializer_class

     def create(self, request, *args, **kwargs):
         data = request.DATA
         if hasattr(self, 'populate'):
             data = self.populate(request, request.DATA,'create')
             serializer = self.get_serializer(data=data)
             if serializer.is_valid():
                 self.object = serializer.save()
                 if hasattr(self, 'post_save'):
                     self.post_save(self.object, created=True)
                 headers = self.get_success_headers(serializer.data)
                 if request.accepted_renderer.format == 'json':
                     return Response({'result':serializer.data,'lookup_field':self.lookup_field,'resource_uri':request.path+str(getattr(self.object,self.lookup_field))+'/'}, status=status.HTTP_201_CREATED,headers=headers)
                 return Response(serializer.data, status=status.HTTP_201_CREATED, headers=headers)
         return Response(serializer.errors, status=status.HTTP_400_BAD_REQUEST)
    def update(self, request, *args, **kwargs):
        partial = kwargs.pop('partial', False)
        instance = self.get_object()
        data = request.data
        if hasattr(self, 'populate'):
            try:
                data = self.populate(request, request.data,'update')
            except:
                pass
        serializer = self.get_serializer(instance, data=data, partial=partial)
        serializer.is_valid(raise_exception=True)
        self.perform_update(serializer)
        if hasattr(self, 'post_save'):
            self.post_save(instance, created=False)
        return Response(serializer.data)

    @csrf_exempt
    def dispatch(self, request, *args, **kwargs):
        """
        `.dispatch()` is pretty much the same as Django's regular dispatch,
        but with extra hooks for startup, finalize, and exception handling.
        """
        self.args = args
        self.kwargs = kwargs
        ###
        ### added in compatibility with lookup field
        if 'lookup' in kwargs:
            kwargs['lookup'] = int(kwargs['lookup'])
        ###
        request = self.initialize_request(request, *args, **kwargs)
        self.request = request
        self.headers = self.default_response_headers  # deprecate?

        try:
            self.initial(request, *args, **kwargs)

            # Get the appropriate handler method
            if request.method.lower() in self.http_method_names:
                handler = getattr(self, request.method.lower(),
                    self.http_method_not_allowed)
            else:
                handler = self.http_method_not_allowed

            response = handler(request, *args, **kwargs)

        except Exception as exc:
            response = self.handle_exception(exc)

        self.response = self.finalize_response(request, response, *args, **kwargs)
        return self.response
Using the above code you can specify multiple serializers using the following syntax
parser = {
    'detail':UsersListSerializer,
    'update':UsersUpdateSerializer,
    'default':UsersListSerializer
}
You must specify at least 'default' serializer. In order to overwrite specific actions you can overwrite like above. So, our CustomModelViewset will easy your task.
And also, we need another facility for pre_save and post_save.
For this you can use methods
pre_save:
def populate(self, request, data, mode):
    return data
you must return the data if you use the populate method. mode is a string and it can be 'create' or 'update'. So based on your requirement you can use it.
post_save:
def post_save(self, obj, created):
    pass
'created' arg is boolean, if True then it means while creating otherwise it is updating.

'obj' is the saved object.

Now we've achieved the required facilities. Let's create our viewsets.
'created' arg is boolean, if True then it means while creating otherwise it is updating. 'obj' is the saved object. Now we've achieved the required facilities. Let's create our viewsets.
class UsersViewSet(CustomModelViewSet):
 """ All User profile Management """

    queryset = Users.objects.all()

    parser = {
        'detail':UsersListSerializer,
        'create':UsersCreateSerializer,
        'update':UsersUpdateSerializer,
        'default':UsersListSerializer
    }
    lookup_field = "username"
    filter_fields = ('username', 'first_name')

    def filtering(self, params, queryset, user = None):
        if "first_name" in params and params['first_name'] != "":
             queryset = queryset.filter(first_name__icontains = params['first_name'])
        if "username" in params and params['username'] != "":
             queryset = queryset.filter(username = params['username'])
        return queryset
    def create(self, *args, **kwargs):
        return Response({'message':'Invalid Request'}, status=status.HTTP_405_METHOD_NOT_ALLOWED)
""" user can update only his detail """
    def update(self, *args, **kwargs):
        if self.request.user.username == kwargs['username']:
            return super(UsersViewSet, self).update(*args, **kwargs)
        else:
            return Response({'message':'Youre not Authorized'}, status=status.HTTP_405_METHOD_NOT_ALLOWED)
""" No one can delete user account including superuser """
    def destroy(self, *args, **kwargs):
        return Response({'message':'Invalid Request'}, status=status.HTTP_405_METHOD_NOT_ALLOWED)
Link with router urls in main urls.py
from rest_framework.routers import DefaultRouter
from core.authentication.viewsets import UsersViewSet
router = DefaultRouter()
router.register(r'profile', UsersViewSet)
urlpatterns = (
    'others'
     url(r'^api/', include(router.urls)),
    'other',
 )
1.5. Implementing authentication
1.5.1. Create urls
url(r'^login/$', 'core.authentication.views.userLogin'),
url(r'^register/$', 'core.authentication.views.register'),
url(r'^checkuser/$', 'core.authentication.views.checkuser'),
1.5.2. Creating tokens while register and login
a. Registering User
@csrf_exempt
def register(request):
    if request.method == "POST":
        data = json.loads(request.body)
        user = Users()
        user.username = data['username']
        user.password = make_password(data['password'])
        user.first_name = data['first_name']
        user.save()
        token = Token.objects.create(user=user)
        return json_response({
            'token': token.token,
            'username': user.username,
            'first_name': user.first_name
        })
b. Login User
@csrf_exempt
def userLogin(request):
    data = {}
    if request.method == "GET":
        pass
    if request.method == "POST":
        data = json.loads(request.body)
        uname = data['username']
        password = data['password']
        user = authenticate(username = uname, password = password)
        if user is not None:
            login(request, user)
        if user.is_active:
            token, created = Token.objects.get_or_create(user=user)
            return json_response({
                 'token': token.token,
                 'username': user.username
            })
        else:
            return json_response({
                 'error': 'Invalid User'
            }, status=400)
     else:
         data = {
             'message':'Invalid User Credentials'
         }
     data = {
         'message':'Invalid'
     }
     return HttpResponse(json.dumps(data))
c. Logout User
@csrf_exempt
@token_required
def userLogout(request):
    if request.method == 'POST':
        request.token.delete()
        return json_response({
             'status': 'success'
        })
    elif request.method == 'OPTIONS':
        return json_response({})
    else:
       return json_response({
            'error': 'Invalid Method'
       }, status=405)
def token_required(func):
    def inner(request, *args, **kwargs):
        if request.method == 'OPTIONS':
             return func(request, *args, **kwargs)
        auth_header = request.META.get('HTTP_AUTHORIZATION', None)
        if auth_header is not None:
            tokens = auth_header.split(' ')
            if len(tokens) == 2 and tokens[0] == 'Token':
                 token = tokens[1]
                 try:
                      request.token = Token.objects.get(token=token)
                      return func(request, *args, **kwargs)
                 except Token.DoesNotExist:
                      return json_response({
                           'error': 'Token not found'
                      }, status=401)
            return json_response({
                 'error': 'Invalid Header'
            }, status=401)
    return inner
1.6. Implementing chat
In order to implmenet the chat system i'm not going to use the database. Using redis publishing feature i'm a sharing a common channel between any two users.
The following will implement the chat feature.
from ws4redis.redis_store import RedisMessage
from ws4redis.publisher import RedisPublisher
def publishMessage(request):
    message = request.user.username + "is trying to message you"
    toUser = request.GET['username']
    if 'message' in request.GET:
        message = request.GET['message']
        redis_publisher = RedisPublisher(facility='notifications', users=[request.user.username, toUser])
       data = {
           'sender':request.user.username,
           'message':message
       }
      message = RedisMessage(json.dumps(data))
      redis_publisher.publish_message(message)
      return HttpResponse("Published")
In next part of the tutorial we'll see how to integrate these django with our mobile app using AngularJS
Source for authentication: http://blog.nknj.me/token-authentication-django-and-angular